Getting Started with Quality Control
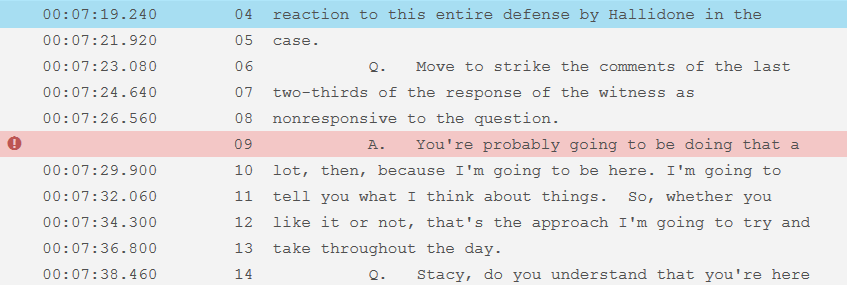
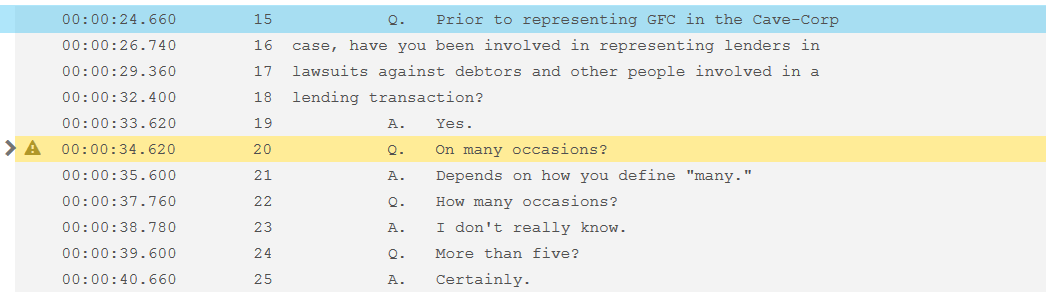
The Quality Control (QC) area highlights the lines from a transcript that were flagged by the synchronization engine during RapidSync as missing, questionable, or out of sequence timecodes. QC singles out each line with an error and surrounds it with context lines for easy navigation and reference.
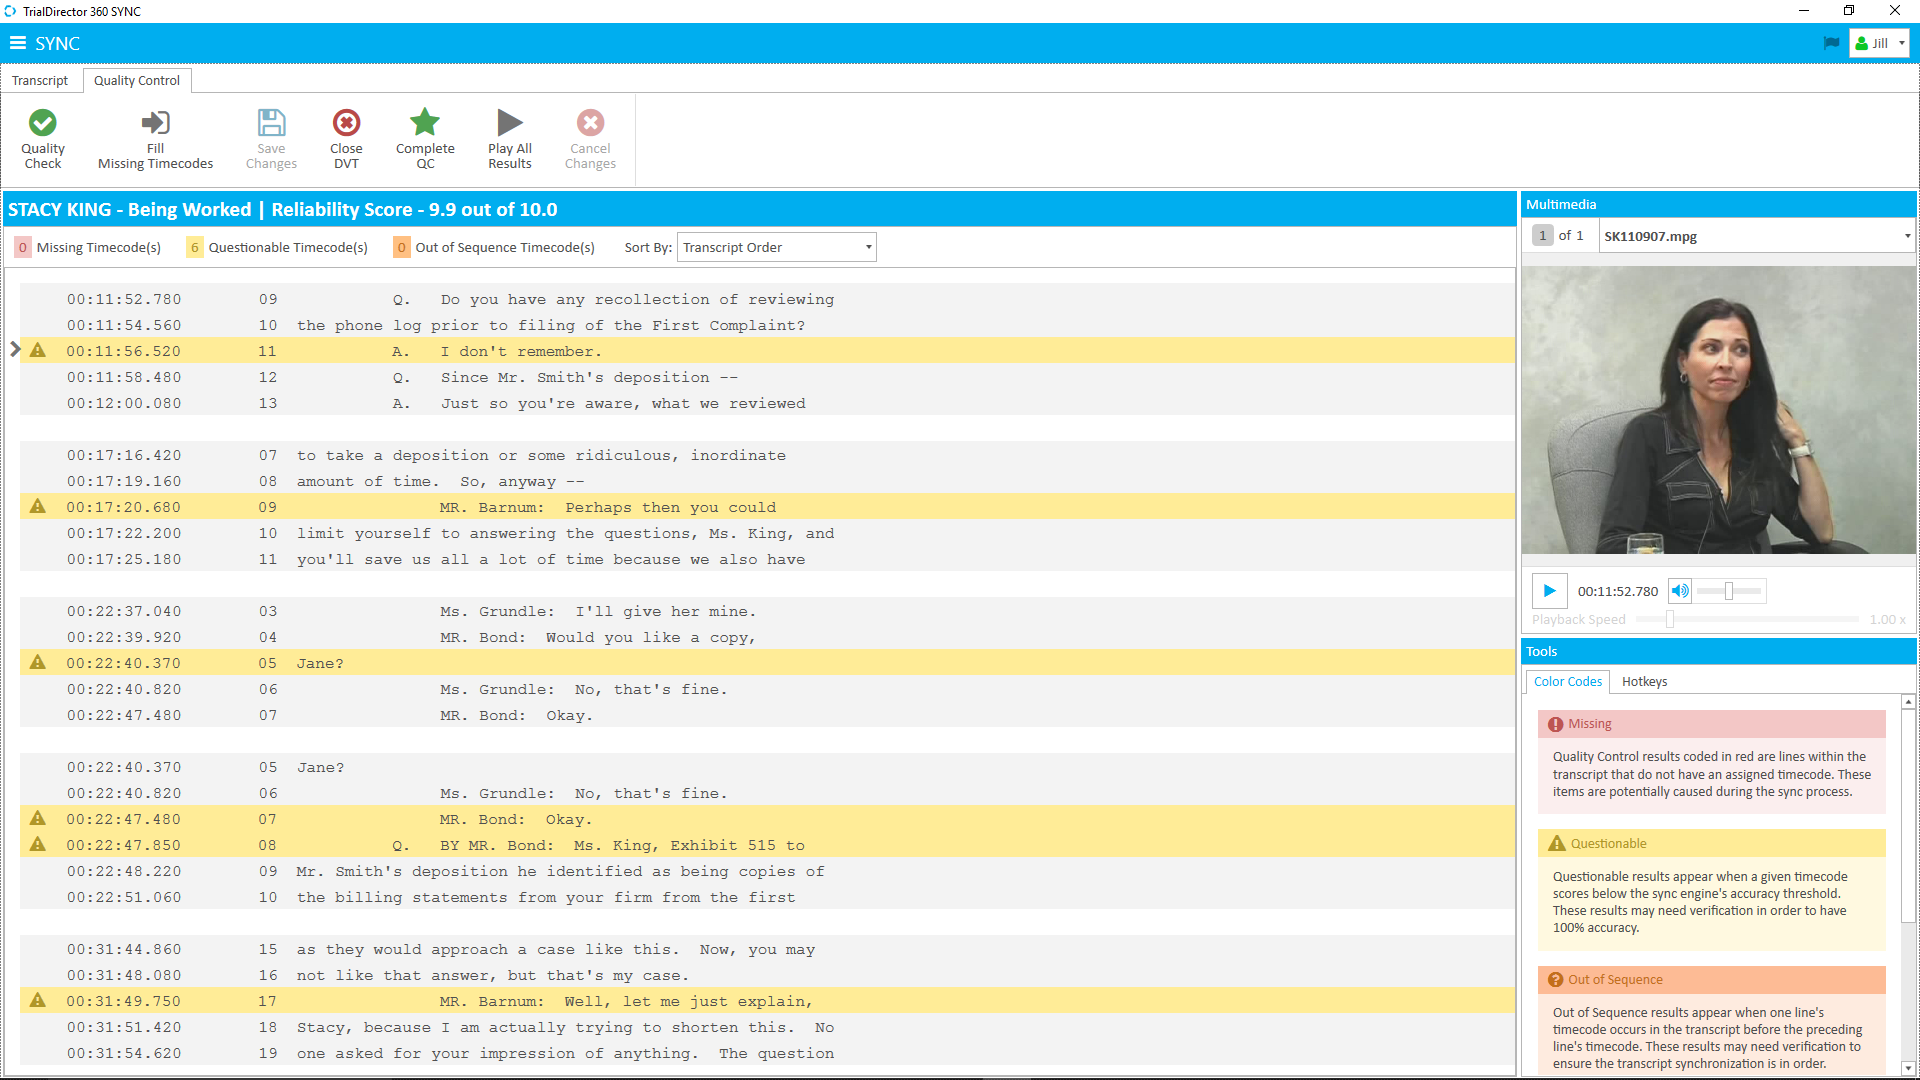
If errors appear in succession in the transcript, they are grouped together in the same potential error block. If the Sort By filter is set to a specific error, like Missing Timecodes, only those timecodes will be grouped in succession in the same potential error block.
QC does not become available until a videographer creates a Digital Video Transcript (DVT) with RapidSync. View the Create a DVT article for more information.
 Note: The videographer can change the number of contextual lines in the results panel, or show the full transcript in SYNC User Preferences under the Quality Control tab. View the Change SYNC User Preferences article for more information.
With the new DVT created and open in Sync, the videographer clicks the Quality Control tab. All of the missing and questionable timecodes immediately appear in the Results panel. Now, the videographer can perform the main tasks of Quality Control:
- Fill Missing Timecodes
- Accept or Correct Questionable Timecodes
- Correct Out of Sequence Timecodes
- Save Changes
- Run Another Quality Check
Note: All the timecodes, missing or questionable, appear in transcript order by default. The videographer can use the Sort By dropdown at the top of the Results panel to view either the questionable or missing timecodes first, making it easier to work with one or the other at a time.
Fill Missing Timecodes
The videographer has the option to fill the missing timecodes automatically or manually.
Automatically
To automatically fill in missing timecodes, the videographer simply clicks the Fill Missing Timecodes button. The lines are immediately filled in and the videographer can move on to her other tasks.
For more information, see the Fill Missing Timecodes article.
Manually
Though there are several ways to approach filling in missing timecodes block by block, the general set of steps the videographer can use include:
- Select a Missing Timecode instance.
- Play the video.
- Press Spacebar when the video reaches the first word of the missing timecode line to insert a timecode.
The videographer can either double click the missing timecode block she wants to fill in, or use the up and down arrow keys. When she selects a line, she notices an arrow in the left margin point to her selection, indicating this line will receive the new timecode.
Note: When a block is selected, the video automatically seeks to the first context line of the block.
Note: The issue indicator (arrow) moves directly on to the next missing timecode potential error block when the spacebar is pressed. The video plays from that block’s starting line. In this way, the videographer can continue to fill in missing timecodes without always having to play the video manually for each block.
Apart from the issue indicator, a highlight bar scrolls along each line while the video plays. If the highlight bar is too distracting, the videographer can press H to hide it.
Other Approaches
As mentioned previously, there are several approaches to begin filling in timecodes manually:
Select and Toggle Play/Pause – This method best represents the steps discussed previously. The videographer can select a timecode block and toggle the video to play and pause from:
- The right-click context menu
- The Pause hotkey
- The media player
Note: The right-click context menu is not available on TrialDirector360.com. Instead, the same options for handling one selected error at a time appear in the bar directly above the transcript when QC is open.
Play All Results – This option can be accessed from:
- The ribbon bar
- The right-click context menu
- The Ctrl + Pause hotkey
It automatically selects the first timecode block and starts playing the video from the first line of the first timecode block in the Results panel.
Play All From Here – This option can be accessed from:
- The right-click context menu
- The Shift + Pause hotkey
The videographer can select any timecode block in the results panel and choose this option to play the selected block and on from that point.
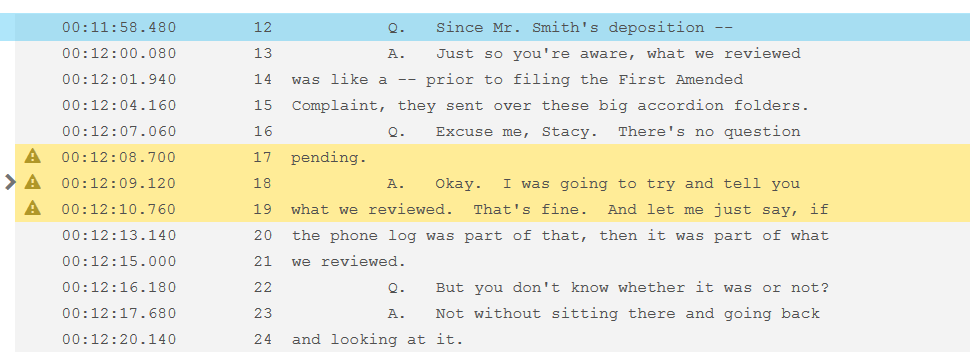
Accept or Correct Questionable Timecodes
Another reported timecode from the synchronization process is Questionable Timecodes.
The number of questionable timecodes reported is affected by the reporting threshold set in the SYNC User Preferences. The RapidSync engine always performs at the same excellent quality. The threshold represents every different user’s confidence in the synchronization result. Questionable timecodes are more than likely correct, but can be verified and corrected using many of the same methods to fill in missing timecodes.
Accepting Questionable Timecodes
The videographer must accept questionable timecodes manually. She follows these steps:
- Select a Questionable Timecode instance.
- Accept the timecode by:
- Pressing Z on the keyboard
- Right clicking and selecting Mark as Accepted
The videographer can either double click the questionable timecode block she wants to verify, or use the up and down arrow keys.
Note: These same steps can be used to mark lines as unspoken. Instead of pressing Z, press X on the keyboard, or right click on the block and select “Mark as unspoken”.
Correcting Questionable Timecodes
The videographer may want to manually replace the questionable timecode altogether. To replace the timecode, she follows the same steps to fill missing timecodes:
- Select a Questionable Timecode instance.
- Play the video
- Press Spacebar when the video reaches the first word of the missing timecode line.
The videographer can either double click the questionable timecode block she wants to verify, or use the up and down arrow keys.
The new timecode appears and the issue indicator (arrow) moves directly on to the next block when spacebar is pressed. The video plays from that block’s starting line.
Apart from the issue indicator, a highlight bar scrolls along each line while the video plays. If the highlight bar is too distracting, the videographer can press H to hide it.
Correct Out of Sequence Timecodes
Out of sequence timecodes can appear when the participants in the deposition talk at the same time, or timecodes were manually entered in error.
Correcting out of sequence timecodes is simply a matter of finding the correct order the lines were said in the video.
Steps for correcting these errors follow closely with filling missing timecodes:
- Select an Out of Sequence Timecode instance.
- Delete the timecode.
- Play the video.
- Press Spacebar when the video reaches the first word of the out of sequence line to insert a timecode.
The videographer can either double click the out of sequence timecode block, or use the up and down arrow keys. The arrow in the left margin points to her selection, indicating the line is active.
Note: The blue highlight bar that scrolls with the video as it plays highlights the line with the earliest timecode in the block.
The videographer presses Delete on her keyboard to remove the out of sequence timecode.
Now, she can treat the line as if it were missing a timecode and fill it in.
The videographer presses Spacebar and the line is assigned a new timcecode.
Save Changes
The videographer has done a lot of work on her DVT. To save the changes she has made so far, she clicks Save Changes. SYNC saves all the work the videographer has done up to that point.
There may be situations where the videographer must get rid of the changes she made in QC. As long as she has not saved, the videographer can get rid of all the changes at once, or undo changes to individual lines:
- Click the Cancel Changes button.
- Right click on the changed line and select “Undo changes”.
This button removes all the changes made in QC up until the last save point.
This option only removes the change from the selected line.
Note: On TrialDirector360.com, this button is located in the button bar directly above the transcript.
Quality Check
The Quality Check button performs a new timecode check on the open DVT and replaces the current results with the new analysis. There are a number of ways this feature can be useful:
- After changing the reporting threshold in SYNC User Preferences to see the different number of questionable timecodes.
- After filling missing timecodes and accepting questionable timecodes in order to see progress on the DVT.
- After Manually syncing a transcript in the Transcripts tab.
Conclusion
QC allows the videographer to quickly move through a DVT and ensure the text and audio have been synced appropriately. She has all the options she needs to customize the look of the QC Results and fill and accept any flagged timecodes.
From here, consider reading over our Quality Control Best Practices.