Add a Workbook to a Case
A paralegal needs to add a workbook to his case to help him organize items.
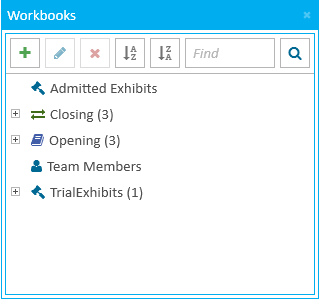
The paralegal can add a workbook to a case using the Workbooks Explorer.
To add a workbook to a case from the Workbooks Explorer, the paralegal opens a case and follows the steps below:
- Open the Workbooks Explorer.
- Click the Add button in the explorer.
- Fill in the information for the workbook.
- Workbook Type - The selected type for the workbook
- Standard - A normal workbook to help organize items
- Carousel - A workbook that displays items in a unique way in TrialDirector 360 PRESENT
- Name - A unique name to help identify the workbook
- Color - The color assigned to help identify the workbook
- Click the Save button.
- Save - Saves the workbook, does not close the dialog, and clears the fields so the paralegal can create another workbook right away
- Save & Close - Saves the workbook and closes the Add Workbook dialog
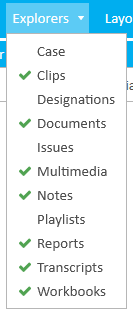
The paralegal clicks the Workbooks Explorer tab to open it.
If the explorer is hidden, he can use the Explorer dropdown in the main menu to view it.
The paralegal clicks the Add button in the explorer.

 Note: The paralegal can also access the Add button by the right clicking on an existing workbook. The new workbook created will be added as a child of the workbook the paralegal originally selected.
The Add Workbook dialog appears.
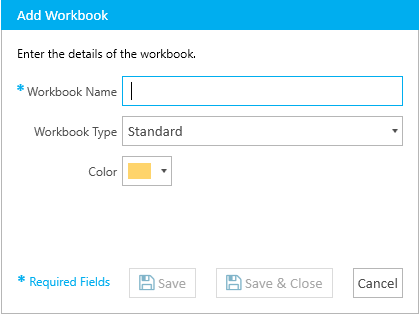
The paralegal enters the following information in the Add Workbook dialog:
With the information filled in, the paralegal can move on to the next step.
There are several save options for the paralegal's convenience:
When a workbook is added, it appears in the Workbooks Explorer.