Publish a DVT
After creating a DVT and resolving potential errors in Quality Control, a videographer needs to publish the synchronized transcript to a DepoView Volume to send to the videographer's client.
Options for publishing a DVT to another file type include:
- DepoView Volume
- TrialDirector 6.x
- DepoView for iPad
- Open DVT (XML)
- Text (TXT)
 Note: Publishing to a DepoView format may take time. A notification will appear when the process is complete.
To publish a DVT to a different file format, with a DVT open in the view, the videographer follows the steps below:
 Tip: The same publish options can be accessed on TrialDirector360.com. In the SYNC Start Page, select the completed DVT and click the Publish DVT button.
- Click the Publish DVT button.
- The SYNC Start Page
- The ribbon bar in the Transcripts tab
- The Job Summary view in Job History
- Enter information and select options for the DVT.
- The videographer chooses a location on her computer for the DVT.
- She enters an output name.
- She selects the DepoView Volume format option.
- Click Next.
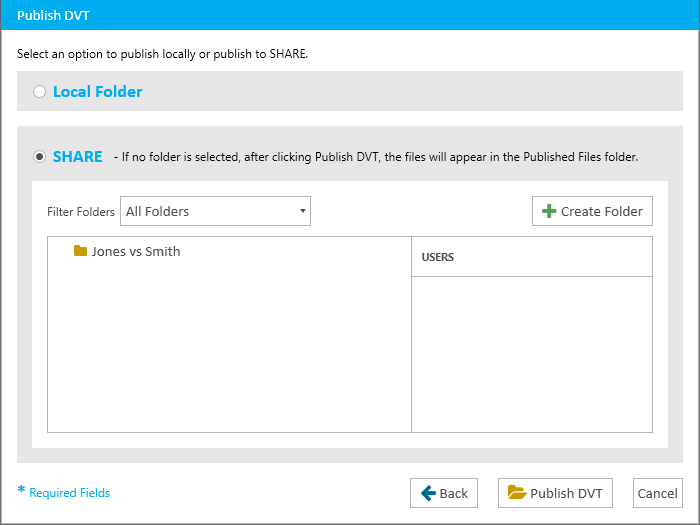
- Select the Local or SHARE option.
- Click Publish DVT.
Note: The Publish DVT button activates only after the DVT has been completed in QC.
The videographer can access this button from:

The Publish DVT dialog appears.
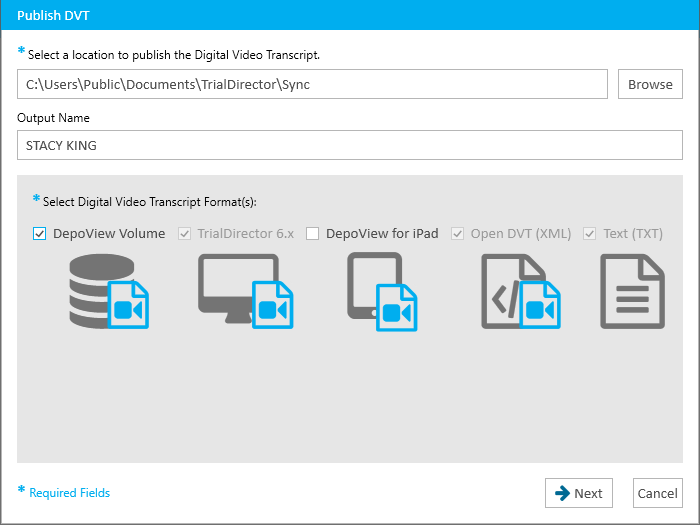
She can type in a file path directly or navigate to her desired location with the Browse button.
Note: These output options also appear in the Recent Jobs table and Job History on TrialDirector360.com. Click the Publish DVT button to open the options.
The Next button appears if TrialDirector 360 SHARE is active on the videographer's account. The next step in the Publish DVT dialog appears.
Otherwise, the videographer simply selects Publish DVT, and the file format she chose is published to her computer.
If the videographer selects the Local option, the format she chose will be published to the location on her computer she specified in the first step.
If the videographer selects the SHARE option, she can choose where to publish the output within the folders on her SHARE account.
Note: The videographer needs to create a new folder, but she doesn't want to stop this publish process and navigate to SHARE to do it. The videographer can create folders in SHARE from this step in the Publish DVT wizard. Using this view, she navigates to the location where she wants the new folder to reside and clicks the Create Folder button. The SHARE view is replaced with the Create Folder dialog: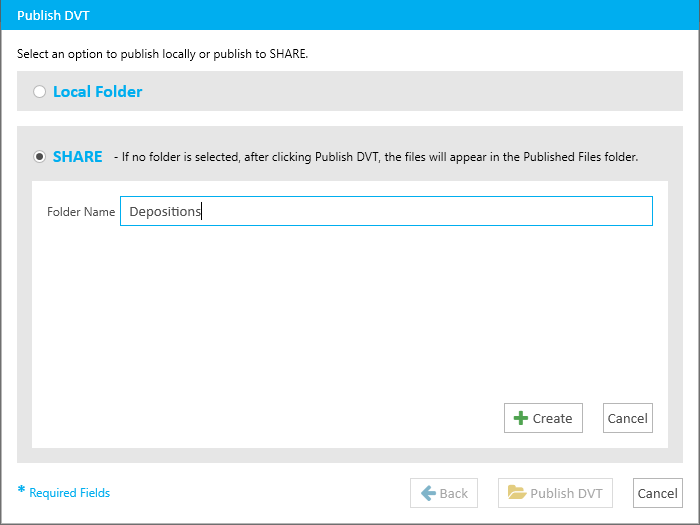
She enters a name for the new folder and clicks Create. The folder is created at the location within SHARE that was open when the videographer clicked the Create Folder button. The videographer can now publish her DVT to the new folder.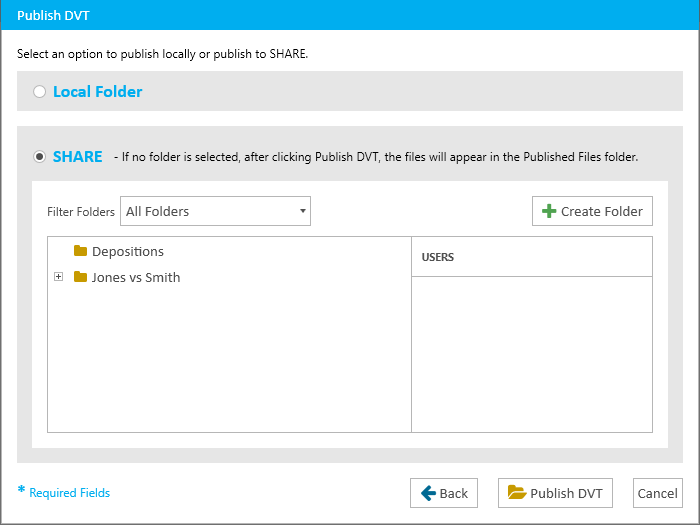
With the folder created, the videographer must navigate to the SHARE feature set to share the folder with others.
The videographer can find the new file formats for the DVT she published in the location she chose.
Note: The Publish DVT dialog contains the option to publish to SHARE. View the Publish to SHARE article to learn more.